Creating the “Hello World” Widget
To learn how to create a widget, create a simple widget in the site root/widgets folder. This widget is based on the Hello World widget that is installed with the Developer Sample site with the following files:
HelloWorld.ascx- user control fileHelloWorld.ascx.cs- user control codebehind fileHelloWorld.ascx.jpg- image that represents this control on the widget menu
Step 1: Copy, Paste and Rename HelloWorld.ascx and HelloWorld.ascx.jpg
- Open your Web site in Visual Studio.
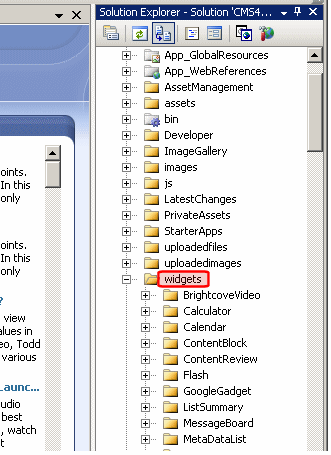
- In the Visual Studio Solution Explorer, open the
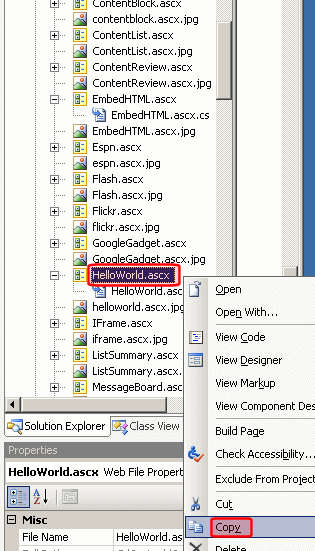
widgetsfolder. - Within that folder, scroll down to and select
HelloWorld.ascx. - Right click the mouse and choose Copy.
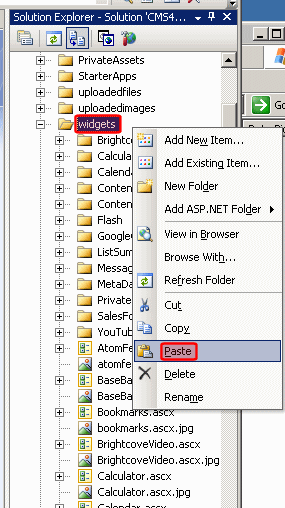
- Scroll up to the
widgetsfolder. - Right click the mouse and choose Paste.
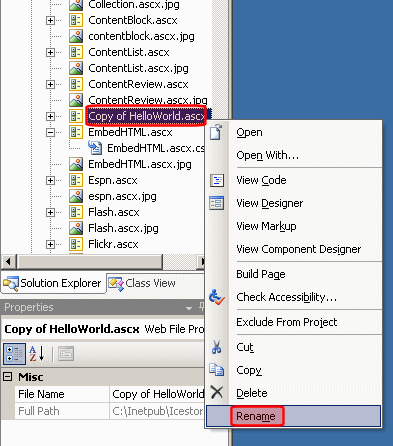
- Scroll down until you see
Copy of HelloWorld.ascx. - Right click the mouse and choose Rename.
- Rename the file
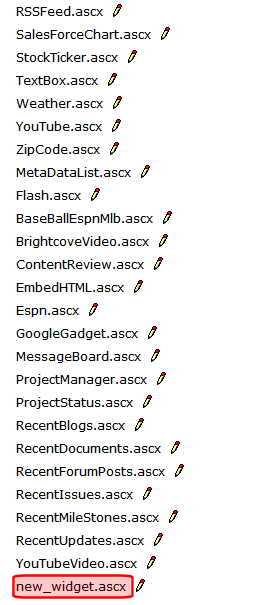
new_widget.ascx. Notice that Visual Studio also renames the codebehind file tonew_widget.ascx.cs. - The image file is 48 x 48 pixels and 72 dpi.
- Copy, paste, then rename the
helloworld.ascx.jpgfile tonew_widget.ascx.jpg.Ektron CMS400.NET administrators (like Grace) and content authors (like the Marketing team) use a widget’s image to select it, as shown below.
Step 2: Update the Class Names in the New Files
- Open
new_widget.ascx. - On the first line of that file, replace the reference to
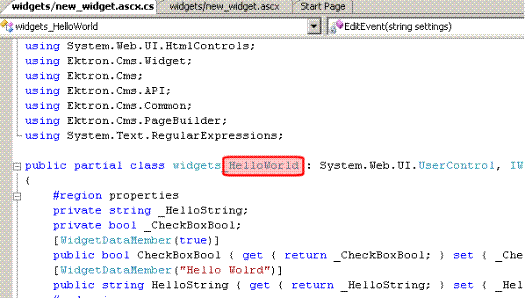
HelloWorld(circled below) withnew_widget. - Open the codebehind file,
new_widget.ascx.cs. - Again, replace the class
HelloWorldwithnew_widget. - Save
new_widget.ascxandnew_widget.ascx.cs. - Check both files for errors by choosing Build > Build Page. Correct any errors before proceeding.
Step 3: Add Widget in Ektron CMS400.NET Workarea
- Open the Ektron CMS400.NET Workarea.
- Choose Settings > Configuration > Personalizations > Widgets.
- Click Synchronize (
).
- You see the new user control file,
new_widget.ascx, at the bottom of the screen. - Choose Settings > Configuration > Template Configuration.
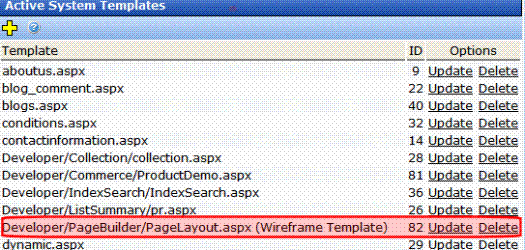
- Find the template that you created in Building Pages, PageLayout.aspx. Or, any Wireframe template that you are using to create a PageBuilder page.
- Click Update.
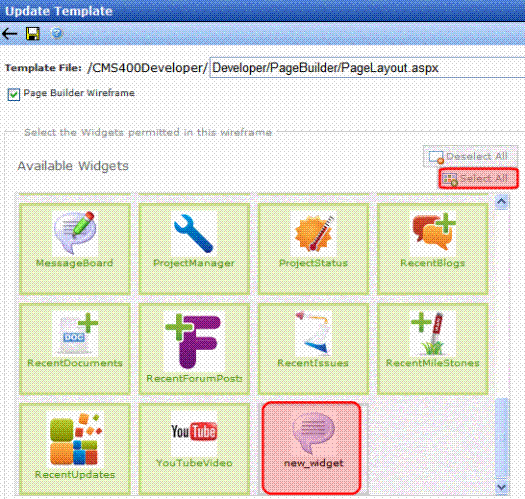
- On the Update Template screen, scroll down until you see the new widget.
- Click Select All (circled in the figure).
- Click Save (
 ).
). - For directions on creating a PageBuilder page, see Steps to Creating a “PageBuilder” Page
- Go to Content and select a folder that has a PageBuilder page.
- Edit the PageBuilder page.
- Open the Widget menu.
- Make sure your new widget appears on the menu.
After you create a new widget and enable it in the Ektron CMS400.NET Workarea, you can begin to customize it. For more information about customizing widgets, see Customizing Widgets.
The next sections explain details about the files you copied and renamed above.
 Show me.